Brake pads wear away a tiny amount every time you press the pedal, but the performance loss is anything but tiny once they drop below a safe thickness. Stopping distance, brake fade and even how your ABS behaves are all influenced by how much friction material remains on each pad. Understanding brake pad minimum thickness is not just about passing an MOT; it is about how much grip you actually have in an emergency stop on a wet dual carriageway. If you know when to replace pads, how MOT standards differ from manufacturer limits, and how to measure them accurately, you are in a much stronger position to protect both your safety and your wallet.
Brake pad minimum thickness: regulatory standards and legal safety thresholds in the UK and EU
UNECE R90, DVSA MOT manual and UK legal criteria for brake pad minimum thickness
Modern friction materials in Europe are type-approved under UNECE R90. This regulation focuses on performance (such as stopping distance and fade resistance) rather than directly specifying a universal brake pad minimum thickness in millimetres. In practice, the legal framework in the UK comes from the Road Vehicles (Construction and Use) Regulations and is applied through the DVSA MOT Testing Manual. For most light vehicles, the accepted legal lower threshold for lining thickness at MOT is about 1.5 mm, provided the pad is still secure and not worn to the backing plate.
That figure is best seen as an absolute emergency limit. MOT guidance also requires that friction material is present across the full working surface and that no metal backing is exposed. If an MOT tester can see pads worn to the metal, or materially below around 1.5 mm, the vehicle will be failed as “dangerous”. For everyday driving, treating 1.5 mm as a target is extremely risky; real-world safe brake pad thickness is significantly higher than that bare legal minimum.
Legal limits are set as a last line of defence, not as a target thickness to drive down to.
Manufacturer service limits: BMW, volkswagen, toyota and other OEM specifications compared
Vehicle manufacturers set their own service wear limits, normally higher than MOT and legal thresholds. BMW, for example, often calibrates its electronic wear sensors to trigger a warning at roughly 2 mm of friction material remaining. Volkswagen and Audi take a similar approach, with sensors or workshop data specifying minimum usable thickness around 2–3 mm. Japanese manufacturers such as Toyota and Honda tend to recommend pad replacement by 3 mm in standard dealer schedules, even if the pad could technically operate slightly thinner.
Thickness figures also vary with pad design. A BMW M car may start with a 14–16 mm pad thickness, while a small city car may have 10–11 mm when new. That means 3 mm on one vehicle is not necessarily the same percentage of life as 3 mm on another. Manufacturer documentation and workshop data therefore always trump generic rules, especially on heavy EVs or performance models where brake system loads are much greater.
Differences between legal minimum thickness and workshop replacement recommendations
Much of the confusion around brake pad minimum thickness comes from the difference between “allowed to be on the road” and “working well under stress”. The MOT manual only has to ensure a car passes a basic brake efficiency test and has no obviously unsafe wear. Independent workshops and main dealers, on the other hand, aim to preserve stopping power in demanding situations and protect discs from damage.
For this reason, most professionals use a 3 mm rule of thumb for recommending brake pad replacement on everyday road cars. Pads running below 3 mm tend to run hotter, wear faster and transfer more heat into the discs. This non‑linear wear means the last few millimetres can disappear much more quickly than the first few. Drivers who leave pads to 1–2 mm to “get full value” frequently end up paying more because the discs are scored or overheated and must be replaced at the same time.
How MOT testers assess brake pad wear, exposed backing plates and advisory thresholds
During an MOT, the tester is not allowed to dismantle the brakes. Pads are checked visually where possible, usually through the calliper window or alloy wheel spokes, and by assessing brake performance on the roller brake tester. If a pad looks “dangerously” thin, has loose material, or shows any sign of metal-to-metal contact with the disc, the vehicle will fail. Pads estimated around 3 mm thickness are often marked as an advisory, even though they technically still pass.
Because testers cannot remove wheels in every case, marginal pads can slip through if access is poor. That is why relying on the MOT alone as a safety benchmark can be misleading. A specialist service will normally remove the wheels, take accurate measurements and note brake pad depth in the service record, giving a much more realistic picture of remaining life than a basic legal inspection can provide.
How brake pad thickness affects stopping distance, brake fade and thermal load
Reduced friction material volume and its impact on heat dissipation under repeated braking
The friction material on a pad acts like a small heat sink. Under repeated braking, heat is generated at the pad–disc interface and then absorbed and dissipated through both components. As pad thickness decreases, the volume of material available to store and spread that heat also decreases. Imagine boiling water in a very thin pan versus a heavy, thick one: both will get hot, but the thin pan overheats far faster.
Brake pads under 3 mm tend to reach higher internal temperatures during hard or repeated stops, especially on heavy vehicles or during motorway descents. Elevated temperature accelerates wear, can damage binders in the friction compound, and increases the risk of glazing and fade. This is why some technicians observe that pads can lose the last 2 mm of thickness much faster than the previous 5–6 mm; the wear rate is not linear because the thermal load per millimetre of material is increasing.
Correlation between pad thickness, coefficient of friction (µ) and emergency braking distance (60–0 mph)
Braking force depends on clamp load, disc radius and the friction coefficient µ between pad and disc. A worn pad with overheated or degraded material can suffer a drop in µ, particularly at high temperatures. Even a 0.1 reduction in µ (for example from 0.45 to 0.35) can add several metres to a 60–0 mph stopping distance. Independent tests on typical family cars show that, from 60 mph, total stopping distance can increase by 10–20% when operating on near‑limit pads and discs compared with a healthy system.
Pad thickness itself does not change µ in a simple linear way, but its effect on temperature does. Thinner pads run hotter; hotter pads, especially budget organic compounds, often deliver a lower and less stable coefficient of friction. For you as a driver, that can translate into a pedal that feels “wooden” or inconsistent just when maximum braking is required, such as an emergency stop on a wet A‑road.
Brake fade, boiling brake fluid and pad glazing on discs during high‑temperature operation
Brake fade occurs when the system can no longer convert kinetic energy into heat at the same rate it is being generated. There are three main contributors: pad fade, fluid fade and disc fade. Thin pads can suffer pad fade when the friction compound overheats and starts to decompose or out‑gas. This gas layer reduces contact pressure and µ, causing a longer pedal travel and reduced stopping power.
Extreme heat also transfers into the calliper and brake fluid. Standard DOT 4 fluid has a dry boiling point around 230–260°C, but that can fall to 155–180°C as the fluid absorbs moisture over time. Under heavy braking, especially when pads are thin and discs are below their minimum thickness, fluid can approach these boiling temperatures and form vapour bubbles. The result is a spongy pedal or temporary loss of braking known as fluid fade. Glazing of the pad surface and blue discolouration of the discs are both signs that temperatures have regularly exceeded the design window.
ABS, ESC and brake bias behaviour with near‑limit brake pad thickness
Modern vehicles rely on ABS (anti‑lock braking system) and ESC (electronic stability control) to allocate brake force and prevent wheel lock. These systems assume that each pad and disc can deliver a predictable amount of grip for a given hydraulic pressure. Uneven pad thickness, especially where one side is close to the backing plate, disrupts this balance and can subtly alter brake bias front‑to‑rear or side‑to‑side.
In practice, that might mean ABS interventions that feel harsher on one wheel, or a car that squirms or pulls under very hard braking even though the tyres are matched. Near‑limit pad thickness at one corner can also cause that wheel to overheat first, forcing the stability systems to work overtime and lengthening brake distances. Addressing pad thickness early, and replacing pads as an axle set, preserves the calibrated behaviour of these electronic systems and helps the car respond as the engineers intended.
Typical minimum thickness values for disc brake pads on passenger cars, vans and performance vehicles
Common workshop rules of thumb: 3 mm minimum vs 1.5–2 mm absolute limit on everyday road cars
For most mainstream passenger cars with disc brakes on at least the front axle, the typical pattern looks like this: new pads are around 10–12 mm thick, the absolute legal limit sits near 1.5–2 mm, and the recommended service replacement point is 3 mm. Many experienced technicians advise drivers to think of 3 mm as “time to plan a replacement”, not “still plenty of life left”.
Consider a simple mileage example. If original pads were 12 mm and now measure 3 mm at 40,000 miles, the car has used 9 mm over that distance – roughly 4,400 miles per millimetre. On paper, another 1.5–2 mm might seem like 7,000–9,000 miles. In reality, as pads get thinner they run hotter and wear faster, so the last 2 mm might only cover half that distance, especially with urban driving, towing or enthusiastic use of performance. Building in a safety margin is far cheaper than replacing scored discs later.
Factory specifications for disc pad wear limits on ford fiesta, VW golf, BMW 3 series and tesla model 3
Although exact figures vary year by year, several patterns emerge from popular models:
| Model | Approx. new pad thickness | Typical service wear limit | Sensor / warning behaviour |
|---|---|---|---|
| Ford Fiesta (petrol, front) | ~11 mm | ~2–3 mm | No sensor on many trims; checked at service |
| VW Golf (Mk7, front) | ~12 mm | ~2 mm | Wear sensor on one inner pad triggers warning |
| BMW 3 Series (G20, front) | ~12–14 mm | ~2 mm | Digital “service due” prediction with wear sensor |
| Tesla Model 3 (front) | ~11 mm | ~3 mm | Monitored at service; regen braking extends life |
Note how most factory data treats anything at or below 2 mm as end‑of‑life, even if there is no immediate legal breach. Battery‑electric cars such as the Tesla Model 3 use strong regenerative braking, so pads can last 70,000 miles or more, but thickness checks are still essential because corrosion and lack of regular use can cause sticking or uneven wear long before friction material runs out.
Differences in minimum thickness between front and rear axles on heavier SUVs and light commercial vehicles
Heavier SUVs and vans place significantly more load on their braking systems, particularly on the front axle. A typical family SUV might place 60–70% of the braking effort on the front brakes under heavy deceleration. As a result, front pads are often larger and start thicker than rear pads, but they also wear much faster. On a medium van or people carrier, front pads can be down to 3–4 mm while the rears still have 6–7 mm remaining.
Minimum recommended thickness is usually similar front and rear in absolute terms – around 3 mm for replacement, with 1.5–2 mm as a dangerous limit – but service intervals and inspections should account for axle load. For vehicles frequently used for towing or carrying full passenger loads, planning front brake pad changes earlier is one of the most effective ways to maintain safe stopping distances and avoid heat‑cracked discs.
Track, fast‑road and high‑performance pads (brembo, EBC, ferodo racing) and their wear indicators
Dedicated fast‑road and track compounds from brands like Brembo, EBC and Ferodo Racing use different friction materials, often with higher operating temperature windows and different wear behaviour. Pads such as EBC Yellowstuff or Ferodo DS2500 may begin life at 16–18 mm thickness and tolerate very high disc temperatures without fade, but they can also shed material more quickly once worn into the lower half of their life.
Many motorsport-oriented pads omit electronic wear sensors altogether, relying instead on visual inspection and scribed grooves in the pad surface. When the groove disappears, it signals that the pad is close to its recommended minimum thickness. High‑performance braking systems from OEMs (for example some Brembo‑equipped hot hatches) often combine electronic warning wires with metal “squealer” tabs that emit a high‑pitched noise shortly before the pad reaches its design wear limit, giving drivers multiple layers of warning before the backing plate is exposed.
Drum brake shoes, wear linings and minimum thickness standards compared to disc pads
While disc brakes dominate modern front axles, many small cars and light commercials still use drum brakes on the rear. Instead of flat pads, these systems use curved brake shoes with friction lining bonded or riveted to a metal shoe. New linings typically start between 4 mm and 6 mm thick. Minimum recommended thickness is usually around 1.5 mm of lining above the shoe, although exact figures vary by manufacturer.
Unlike discs, drum hardware is largely hidden, so MOT testers cannot properly assess shoe thickness without removing the drum – something the test does not require. As a result, drum brake wear often goes unseen until a proper service is carried out or symptoms such as reduced handbrake efficiency, grabbing or noise appear. For you as a driver, this means rear drum shoes can quietly fall below their safe minimum lining thickness without any immediate warnings. Periodic full brake inspections, including drum removal and measurement, are essential on vehicles still using this design, especially for those carrying regular heavy loads.
Inspection methods: how to measure brake pad thickness accurately at home and in the workshop
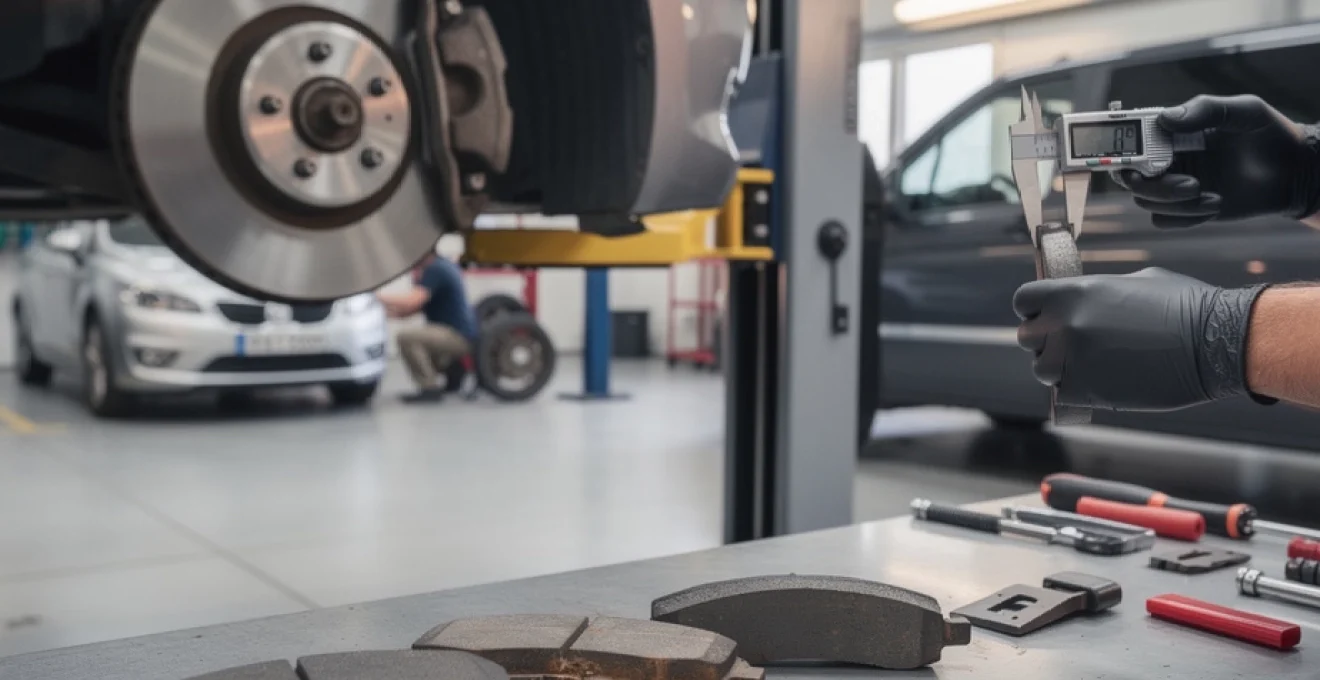
Using a digital vernier calliper or brake pad gauge through the caliper window
For a reliable brake pad thickness measurement, tools make a big difference. A simple digital vernier calliper or purpose‑made brake pad gauge allows a technician to hook over the pad backing plate and read the remaining friction material in millimetres. On many cars, this can be done through the calliper window once the wheel is removed, without disassembling the brake. Measuring down to 0.1 mm resolution ensures that borderline pads are identified long before they reach their minimum safe thickness.
At home, a basic brake gauge or even a carefully used steel rule can give a reasonable estimate if you have good access. The key is to measure only the friction material, not the metal backing plate. Because backing plate thickness is usually 4–6 mm, confusing total pad height with friction thickness can create a dangerously optimistic impression of remaining life.
Visual inspection through alloy wheel spokes vs wheel and caliper removal
Many drivers try to check pads visually through alloy wheel spokes. While this can highlight extreme cases – such as pads clearly on the metal – it is not accurate for estimating a remaining 2–4 mm. The outer pad is sometimes visible, but inner pads often wear faster because they sit closer to the calliper pistons and see more heat. On some designs, especially multi‑piston callipers or heavily styled wheels, you cannot see the pad edges at all.
Removing the wheel and inspecting both inner and outer pads is the minimum for a trustworthy check. Workshops may go further and slide the pads out of the calliper to clean and measure them on the bench, especially where corrosion or sticking sliders are suspected. That approach takes a little longer but pays off in accurate measurements and fewer surprises.
Reading built‑in wear indicators, squealer tabs and electronic pad wear sensors (audi, Mercedes‑Benz)
Most modern cars support at least one form of wear indication. Many mainstream pads include a small metal “squealer” tab set slightly above the backing plate. When the pad reaches that level, the tab lightly touches the disc and emits a high‑pitched squeal that rises with speed and during light braking. Although annoying, this early warning can save you from ever reaching metal‑to‑metal contact.
Premium brands such as Audi, Mercedes‑Benz and BMW also integrate electronic pad wear sensors. A small loop of wire is embedded in the pad material; once the pad wears down to the sensor, the wire breaks and a brake warning light appears on the instrument cluster. Some systems go further, estimating remaining mileage based on driving style and providing an on‑screen countdown to pad replacement. It is essential not to ignore these warnings: the sensor is normally placed around 2–3 mm above the backing plate, so continued driving can quickly eat through the last safe material.
Electronic wear indicators are calibrated as “replace now” signals, not as early advisory hints to leave for months.
Measuring pad thickness across multiple points to detect taper wear and caliper slider issues
Even if overall pad thickness looks adequate, uneven or “tapered” wear can indicate issues that will affect braking performance. When measuring pads off the vehicle, taking readings at several points – leading edge, centre and trailing edge – helps identify whether one end is significantly thinner. A difference of more than about 1 mm across the pad is a red flag for calliper slider stiffness, seized pistons or pad guides that are not moving freely.
On floating callipers, rusty or dry slide pins are a common cause of inner pads wearing faster than outer pads. Left unaddressed, this not only shortens pad life but can cause brake pull or overheating at a single wheel. Including a multi‑point pad thickness check in each service allows early intervention with lubrication, slider overhaul or calliper replacement before more expensive damage occurs.
Recording pad thickness in service history and estimating remaining mileage based on driving profile
One of the most useful habits for long‑term brake care is simply writing down measured pad thickness at each service. If front pads measured 8 mm at 20,000 miles and now read 4 mm at 40,000 miles, it is reasonable to infer an average wear of 0.2 mm per 1,000 miles. With that data, a technician can confidently estimate that another 2 mm of safe use might remain – subject, of course, to how and where you drive.
Your own driving profile has a decisive impact on any such estimates. City traffic with frequent stop–start, towing, spirited B‑road use or repeated mountain descents all accelerate wear compared to steady motorway mileage. If your usage has recently changed – for example, you have started a daily urban commute – future wear may not mirror past data. Treat mileage figures as guides rather than guarantees, and consider replacing earlier if planning long trips fully loaded.
Risk scenarios of driving below minimum brake pad thickness and related component damage
Driving with pads below minimum thickness is not only a safety gamble; it is also a direct route to larger repair bills. Once friction material is exhausted and the steel backing plate touches the disc, every brake application gouges the disc surface. In many cases, discs with deep scoring must be replaced instead of simply paired with new pads. For larger modern discs – especially on SUVs and EVs – that cost can be several times higher than a timely pad change.
Heat is another under‑appreciated risk. Thin pads and worn discs reduce total thermal capacity, pushing the system into higher temperatures more often. That thermal stress can warp discs, anneal the metal (changing its structure), and even lead to cracks around the vent holes on drilled or slotted discs. A driver might notice vibrations through the pedal or steering, longer stopping distances and a hot smell after heavy braking. In extreme cases, overheated seals can cause callipers to seize, or brake fluid can boil and temporarily remove most of the braking effect.
From a legal and insurance perspective, using brakes below any published minimum thickness can also be problematic. If a post‑collision inspection finds pads worn to metal or clearly below manufacturer limits, questions around roadworthiness and contributory negligence may arise. For company vehicles and light commercials, maintaining brake pad depth above minimum thresholds is therefore as much a compliance issue as a technical one.
Best practices for replacing brake pads before reaching minimum thickness and choosing quality components
Managing brake pad replacement proactively is simpler and cheaper than reacting to a warning light or grinding noise. A sensible approach is to treat 3–4 mm as a planning point: once pads hit this range, arrange replacement within the next few thousand miles, earlier if most of your driving is heavy urban traffic, towing or fast A‑road work. Always replace pads in axle pairs (both fronts or both rears) to maintain balanced braking and consistent ABS behaviour.
Component choice matters just as much as timing. High‑quality OEM or reputable aftermarket pads – ceramic, semi‑metallic or low‑metallic organic – are designed to meet or exceed UNECE R90 performance standards. Cheap, unbranded pads may save money up front but often wear faster, generate more dust and can be noisy or inconsistent when hot. Matching pad compound to your driving style is vital: ceramic pads suit drivers looking for low dust and quiet operation, semi‑metallic pads cope better with higher temperatures and heavier vehicles, while track‑day compounds should only be used by those prepared to accept noise and dust in exchange for high‑temperature stability.
- Schedule brake inspections at least once a year, or every 10,000–12,000 miles, whichever comes first.
- Replace brake fluid at the intervals specified in the handbook, typically every two years, to maintain boiling point.
- Ask for measured pad thickness and disc thickness to be written on each service invoice for future reference.
- Act promptly on any squealing, grinding or dashboard brake warnings rather than delaying until the next MOT.
Attention to calliper condition is also a core part of effective brake pad management. Having sliders cleaned and lubricated, pad abutment points de‑rusted, and pistons checked for free movement during each pad change preserves even contact across the pad surface and prevents tapered wear. On vehicles with drum brakes, requesting periodic drum removal and shoe measurement provides the same peace of mind at the rear axle. With these habits in place, brake pad minimum thickness becomes a figure you stay comfortably above, rather than a line you unwittingly cross.