Outside light wiring on modern vehicles sits at the crossroads of safety, regulation and reliability. A single wiring error on a headlamp, trailer socket or LED light bar can mean an MOT failure at best, or a dangerous loss of visibility at worst. Understanding how outside light wiring diagrams work, how standards apply and how components interact gives you the confidence to modify, fault‑find or upgrade exterior lighting without guesswork. For anyone adding auxiliary lamps to a 4×4, fitting towbar electrics to a caravan rig, or tracing a tail-light fault on a work van, a clear grasp of exterior lighting circuits makes every job faster, cleaner and safer.
Key standards and safety principles for outside light wiring in road vehicles (ECE R48, ISO 6722)
Interpreting ECE R48 mounting and wiring requirements for exterior lighting circuits
ECE R48 is the core regulation that governs how exterior lights are positioned, wired and controlled on road vehicles in Europe and many other markets. It specifies where headlamps, indicators, tail lamps and marker lights must sit, what angles they must cover, and when they must switch on. For example, dipped beam switching logic, rear fog lamp tell-tales, and indicator failure warning are all rooted in ECE R48 requirements. When you study an outside light wiring diagram for a vehicle that is type‑approved in Europe, you are effectively seeing ECE R48 translated into relays, Body Control Module outputs and earth points.
For custom installations such as auxiliary light bars or work lamps, following the spirit of ECE R48 helps you stay road‑legal. High‑beam assist systems must not dazzle oncoming traffic, so additional driving lamps should only energise with the existing main beam circuit and must extinguish with dip beam. Many OEMs therefore design the main beam trigger wire as a low‑current signal to a relay or solid‑state driver rather than a heavy feed. Respecting those trigger-only wires when tapping into a headlamp loom is crucial if you want new lights to behave like factory equipment rather than random add‑ons.
Using ISO 6722 and ISO 16750 to select automotive-grade cables for outside lights
Outside lights live in a hostile environment: temperature swings, road salt, stone impact and constant vibration. ISO 6722 defines the construction and performance of automotive-grade cable used for such circuits, including conductor size, insulation temperature rating and resistance to fluids. ISO 16750 complements this by describing the environmental conditions automotive electronics must withstand, such as voltage spikes, thermal cycling and mechanical shock. Together, these standards point you toward thin-wall, high‑temperature PVC or cross‑linked insulation rather than generic domestic cable.
For an auxiliary LED light bar pulling 15–20 A on a 12 V system, a 2.5–4.0 mm² cable complying with ISO 6722 gives enough current capacity with reasonable voltage drop over a typical bonnet‑to‑roof run. For long trailer or caravan harnesses, voltage drop becomes more critical because some marker lamps sit 5–7 m from the power source. Using a dedicated trailer wiring diagram and uprating to 1.5–2.5 mm² on the brown tail light feed and white earth wire often eliminates dim lamps and intermittent faults caused by undersized conductors.
Fuse, relay and circuit protection strategies for LED and halogen exterior lamps
Exterior light circuits fall broadly into two categories: traditional halogen loads and modern LED loads with electronics built in. Halogen headlamps and work lamps draw high inrush and steady‑state currents, making standard blade fuses and 30/40 A relays an obvious choice. LED lamps, by contrast, have much lower current but often include inbuilt drivers that can be sensitive to voltage spikes. That combination favours slower‑blow fuses sized closer to actual current and, on higher‑end vehicles, solid‑state protection inside the Body Control Module.
A good rule is to size the fuse at 125–150% of the continuous current for a given lamp circuit. So a 10 A LED bar typically gets a 15 A fuse, while a pair of 55 W driving lamps at 9.2 A total usually live on a 15–20 A fuse. Relays allow you to carry that current with minimal load on the dash switch or stalk. Many late‑model cars now use smart-fuse outputs from the BCM, which shut down a circuit if they detect a short or overcurrent, then log a fault code. When interpreting an outside light wiring diagram for such vehicles, look for symbols representing electronic fuses or protected transistor outputs instead of conventional relay coils.
Ingress protection (IP) ratings, connector sealing and corrosion control in exterior light wiring
Exterior lighting connectors and junctions are only as reliable as their sealing. The IP rating system describes how well a component resists dust and water ingress, with IP67 or IP68 generally recommended for under‑body, bumper and roof‑mounted connectors. In practice that means using moulded, grommeted connectors with secondary locks rather than bare spade terminals and PVC tape. Many OEM harnesses use sealed multi‑pin connectors at lamp modules and trailer sockets, together with grommeted pass‑throughs where looms enter the body shell.
Corrosion control is not just about keeping water out; it is also about minimising galvanic couples and electrolysis. Mixing copper conductors, tin‑plated terminals and aluminium bodywork creates an electrochemical cell when moisture is present. Applying dielectric grease, using tinned cable, and anchoring earth lugs directly to factory chassis earth points helps reduce corrosion‑related voltage drops. Over time, even a 0.5 V loss on a tail lamp feed can be enough for modern bulb‑out detection systems to throw warnings or shut down the circuit, so treating connectors as critical components rather than afterthoughts pays off.
Decoding wiring diagram symbols for vehicle exterior lights (headlamps, tail lamps, indicators)
Common OEM wiring diagram conventions used by VW, ford, toyota and BMW
Every manufacturer follows its own drawing style, yet most exterior lighting schematics share a common language. VW and Audi use highly structured, vertical ladder diagrams where each page represents a functional area (for example, exterior lighting) and each circuit runs downward from a common power rail. Ford often uses more free‑form diagrams grouped by subsystem. Toyota combines block diagrams for control units with conventional line schematics, while BMW leans heavily on functional block topology linked to their ISTA diagnostic software.
Regardless of brand, headlamps usually appear as a multi‑function lamp symbol with delineated sections for dipped beam, main beam, DRL and indicator. Tail lamps typically show segments for stop/tail, indicator and reverse, occasionally sharing a single connector. Once you recognise that common approach, switching between a VW Golf trailer wiring diagram and a Toyota Hilux work lamp diagram becomes far less intimidating because the same logic applies to power feeds, earths and control signals.
Reading circuit identifiers, splice points (S), and earth references (GND) on lighting schematics
Outside light wiring diagrams rely heavily on clear identifiers. Each circuit usually carries a code, such as 58R for right rear tail lamp or 56a for main beam. Splice points are often labelled with an S followed by a number (for example, S205), indicating where several wires join in a harness. Earth points appear as a triangle symbol tied to the chassis, usually labelled GND, E or 31. Learning these conventions is like learning musical notation; after a short time, reading the “score” becomes second nature.
When diagnosing a dead indicator or intermittent tail lamp, tracing the feed from the source (battery or BCM output), through the relevant fuses, across splice points and down to the lamp earth often reveals a corroded joint or partially broken wire. Many OEM manuals supplement the schematic with a physical harness layout that shows where splice points and earth references sit in the body: behind the left rear trim, under the right headlamp, or near the towbar socket. Cross‑referencing these two views sharply reduces trial‑and‑error during fault finding.
Understanding multi-function lamp assemblies in diagrams (DRL, sidelights, indicators, stop lamps)
Modern lamp units squeeze several functions into a single housing: DRL, position lamp, indicator, fog lamp and even cornering light. On a wiring diagram, this often appears as a single lamp symbol with multiple internal sections, each labelled with a terminal identifier. For example, a rear combination lamp might show PIN 1 – Tail, PIN 2 – Stop, PIN 3 – Indicator, PIN 4 – Reverse, plus one or two earth pins. LED modules may instead use separate connectors for power and data, especially where adaptive functions or matrix beams are involved.
For you as an installer or diagnostician, this means a multi‑function lamp rarely has a single feed wire to “power everything”. When retrofitting LED tail lights to an older vehicle, splitting circuits correctly for stop, tail and indicators matters not just for function but for bulb‑failure monitoring. Many vehicles measure current or voltage on each individual filament circuit. Joining multiple functions to one feed can trigger dashboard warnings or prevent correct operation of stop lamps under braking while indicators are active.
CAN bus and LIN bus notations in modern headlamp and rear lamp wiring diagrams
As exterior lighting becomes more intelligent, data networks now appear directly in outside light wiring diagrams. Headlamps with adaptive high beam, cornering functions or matrix LEDs commonly communicate with the BCM, steering angle sensor and camera via CAN bus. Rear lamp clusters with dynamic indicators or variable intensity segments often use LIN bus, a simpler, single‑wire network controlled by a local master such as the rear electronic module.
On a diagram, you may see thin lines labelled CAN-H, CAN-L or LIN connecting control units to the lamp modules. These are not power feeds and must not be used to tap a supply for accessories. When adding auxiliary lighting to vehicles with networked lamps, taking power from a dedicated fused feed and using a relay triggered by a conventional high‑beam wire remains the safest approach. Attempting to decode CAN messages or splice into LIN networks for DIY projects quickly becomes complex and can disrupt other functions if done incorrectly.
Typical outside light wiring topologies in modern vehicles
Classic switched 12 V architecture with stalk switch and relay control
Many older vehicles and simpler commercial models still use a classic switched 12 V architecture. The headlamp stalk sends power through a rotary light switch and then onto the dip and main beam via relays. Tail lamps and side markers run from a common feed switched at the dash. Indicators rely on a flasher relay and mechanical switch assembly. Wiring diagrams for such vehicles are refreshingly straightforward: a battery, an ignition feed, a few switches, fuses and relays, and the lamps themselves.
This topology makes adding extra driving lights or work lamps relatively simple. A high‑beam trigger wire runs from the stalk or relay to the headlamps; tapping this to drive a new relay coil is usually all that is required for correct operation. Because the high‑beam circuit carries full lamp current, using a separate fused supply for any additional lamps helps avoid overloading the original harness while preserving the intuitive control of the factory stalk.
Body control module (BCM) driven exterior light circuits with PWM dimming
Most passenger cars from the last decade centralise outside light wiring in a Body Control Module. Instead of long, high‑current runs through the dash, the BCM sits close to the fuse box and uses solid‑state drivers to feed each lamp individually. These drivers frequently use PWM (pulse‑width modulation) to dim DRLs, tail lamps or ambient lighting. For example, a DRL may operate at 100% duty cycle in daytime mode, then drop to 40% duty when the dipped beam or side lights come on.
In a BCM-driven system, the column stalk no longer switches power directly. It sends low‑current signals, often over a LIN bus, to the control module. The wiring diagram reflects this: the stalk appears as a signal input block instead of a simple mechanical switch symbol. When adding an auxiliary light bar, the correct trigger point is usually the high‑beam output from the BCM to the headlamps, not the stalk signal. Because BCMs can be sensitive to added loads, always drive only a relay coil (around 150 mA) from this output rather than the lamp itself.
DRL and automatic headlamp control circuits using light sensors and ignition feed
Daytime running lights and automatic headlamps are now standard on most new cars sold in Europe. The wiring architecture combines an ignition‑switched feed, an ambient light sensor, and often a rain sensor or camera module communicating with the BCM. The DRL circuit typically comes alive when ignition is on and the light sensor detects daylight, switching off or dimming when the headlamps turn on. Automatic headlamps use that same sensor to energise dipped beam when ambient light falls below a threshold or the wipers run for a set period.
From a wiring diagram perspective, DRLs may appear as separate lamps or as part of the main headlamp unit. Their feed often passes through a dedicated DRL relay or a solid‑state driver integrated into the headlamp. If you intend to piggy‑back on DRLs for additional marker lighting or “signature” strips, confirm in the diagram whether the existing feed is controlled by PWM and what its maximum current is. Many DRL circuits are designed for only a few amps and should not be burdened with extra loads.
Trailer lighting harness integration with dedicated trailer control modules (e.g. westfalia, thule)
Modern vehicles rarely tolerate direct splicing of trailer wiring into rear lamp circuits. Instead, dedicated trailer control modules from brands such as Westfalia or Thule monitor tail, brake and indicator feeds via non‑invasive sensing and then drive the trailer socket with separate, protected outputs. This avoids confusing bulb‑out detection and protects delicate BCM outputs from the extra load of trailer lamps. In an OEM trailer wiring diagram, the module usually sits between the rear fuse box and the 7‑pin or 13‑pin socket, with its own power and earth connections.
Typical 7‑pin and 13‑pin standards define which function each pin carries: left indicator, right indicator, tail lights, brake lights, fog lights, reverse, and auxiliary power. For example, UK 12N sockets use pin 1 – left indicator (yellow), pin 3 – earth (white), and pin 6 – brake (red), while 13‑pin European connectors add permanent and switched 12 V feeds for caravan batteries and fridges. Understanding these mappings is essential if you want your trailer lights to work seamlessly with different tow vehicles and avoid mismatched functions.
| Pin | 7-pin function (UK/SAE) | Typical wire colour |
|---|---|---|
| 1 | Left indicator | Yellow |
| 3 | Earth / ground | White |
| 5 | Tail / side / marker | Brown |
| 6 | Brake / stop lamps | Red |
Fail-safe design and bulb-out detection circuits in OEM wiring topologies
Fail‑safe behaviour is baked into most exterior lighting designs. ECE R48 requires indicators to provide a clear warning if a bulb fails, and many manufacturers extend this philosophy to tail lamps, stop lamps and even DRLs. Bulb‑out detection circuits typically measure current draw or voltage feedback on each lamp output. If the measured value falls outside a defined window, the BCM logs a fault, triggers a warning and in some cases activates a backup light source or alternative mode.
For example, some LED rear lamps include redundant segments that illuminate at a reduced intensity if part of the module fails. Others will increase the duty cycle to compensate for a degraded emitter. On the diagram, you may see additional lines representing diagnostic feedback from lamp modules to the BCM. When modifying circuits, adding resistive loads or LED conversions, respecting these detection strategies is vital. Poorly matched LED bulbs with built‑in resistors may either mask genuine faults or cause nuisance warnings, undermining the intent of the fail‑safe design.
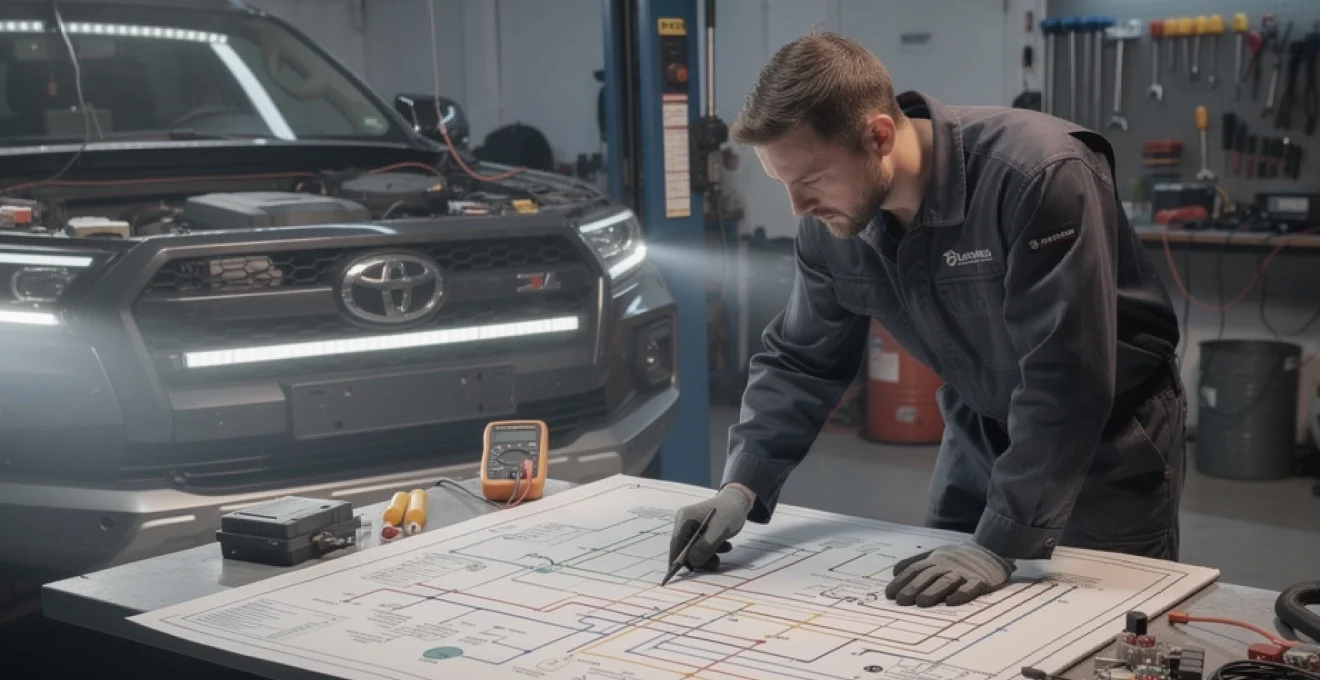
Step-by-step outside light wiring diagram for an auxiliary LED light bar installation
Creating a fused supply circuit from the vehicle battery with appropriate cable gauge
An auxiliary LED light bar is a popular upgrade on 4x4s, pickups and utility vehicles, but it demands proper wiring to avoid voltage drop, overheating or electrical fires. Start by calculating the current draw: divide the light bar’s wattage by system voltage. For a 180 W bar on a 12 V system, that is 15 A. Select a cable with at least 25–30 A capacity; 4.0 mm² automotive cable is a common choice for runs from the battery to a relay mounted near the bulkhead.
Install a waterproof fuse holder as close as possible to the battery positive terminal, using a 20 A or 25 A fuse depending on current draw. Route the cable through existing grommets or add a new one with proper sealing, keeping it away from sharp edges and hot exhaust components. Treat this fused feed as a dedicated supply for the light bar circuit only, which simplifies future fault finding and avoids stacking multiple accessories on a single, overloaded line.
Integrating a 4-pin automotive relay and dash-mounted switch for the LED light bar
A standard 4‑pin relay is the heart of a reliable LED bar wiring diagram. Use pin 30 for the fused battery feed, pin 87 for the output to the LED bar, pin 85 for the trigger (from the high‑beam circuit via a dash switch), and pin 86 for earth. This arrangement means the dash switch only ever carries the small relay coil current, not the full lamp load, and allows you to isolate the bar for on‑road use if required.
Mount the dash switch in reach of the driver but away from airbag modules and wiring. An illuminated switch wired with a separate ignition feed helps you avoid leaving the relay energised with the engine off. For added safety, some installers prefer a three‑position switch: off, automatic with main beam, and on (for off‑road use). Representing these states clearly in your own printed or sketched wiring diagram makes future troubleshooting far easier, especially if the vehicle changes hands.
Using scotchlok, solder-and-seal, or OEM repair terminals to tap into main beam trigger wires
Triggering the relay from the existing main beam circuit allows the LED bar to follow factory headlamp behaviour. Methods for tapping the trigger wire vary in reliability and professionalism. Insulation‑displacement connectors such as Scotchlok can work for low‑current signals but are vulnerable to corrosion and vibration if not sealed. Solder‑and‑seal splices with heat‑shrink tubing offer better durability but must be executed carefully to avoid stiff joints that fatigue.
OEM repair terminals are the gold standard: these crimp into spare cavities in existing connectors or join into harness repair sections supplied by the vehicle manufacturer. Although more time‑consuming, they maintain the harness’s integrity and weather sealing. Whichever method you choose, keep the tap on the low‑current side of the main beam relay or BCM output, and avoid places where mechanical movement such as steering column tilt could stress the joint over time.
Grounding strategies: chassis earth points, star earthing and avoiding ground loops
A clean, low‑resistance earth is as important as a solid positive feed. For an auxiliary light bar, run a dedicated earth cable from the lamp back to a known chassis earth point or directly to the battery negative. Many professionals favour a star‑earthing arrangement, where all accessory grounds converge at a common stud or busbar, rather than chaining earths across multiple components. This minimises ground loops and unexpected voltage differences under load.
Before fastening any earth lug, remove paint and rust to expose bare metal, then secure with a serrated washer and corrosion‑inhibiting spray. If the vehicle uses aluminium body panels or a coated ladder frame, respect the manufacturer’s recommended earth locations shown in their official wiring diagrams. Ignoring these and drilling random earth points can cause long‑term issues such as galvanic corrosion or erratic behaviour of sensitive electronics sharing the same ground reference.
Example wiring layout for a roof-mounted LED bar on a 4×4 (toyota hilux, land rover defender)
Consider a typical roof‑mounted LED bar on a Toyota Hilux or Land Rover Defender. The layout often starts with a 4.0 mm² fused feed from the battery to a relay on the inner wing, then a 4.0 mm² run up the A‑pillar, across the roof gutter and into the light bar. A matching 4.0 mm² earth cable returns to a chassis point under the bonnet. The relay coil takes its feed from the main beam output at the headlamp connector, through a 1.0 mm² wire to the dash switch, then back to the relay.
Physically, routing the loom along the windscreen pillar under trim and using flexible conduit reduces UV damage and chafing. On Defenders and similar vehicles, magnetic or clamp‑on roof bar mounts can carry both the bar and its wiring, allowing removal without permanent alterations. Sketching this arrangement as a simple block diagram showing power, relay, switch, trigger and earth gives you and any future owner a clear reference for maintenance or upgrades.
Wiring diagrams for off-road and commercial vehicle outside lighting (work lamps, beacons)
Off‑road and commercial vehicles often carry more outside lighting than typical passenger cars: rear work lamps, side floodlights, amber beacons, grille strobes and reversing spot lamps. Their wiring diagrams usually adopt a modular approach, grouping lamps by function and location: “rear work lights”, “left‑side scene lights”, “hazard strobes” and so on. Each group often has its own fused feed, relay and switch, simplifying fault isolation and aligning with commercial vehicle standards that demand clear labelling for every auxiliary circuit.
For a tipper truck or agricultural tractor, a dedicated auxiliary fuse box is particularly useful. Heavy‑duty connectors rated to AS4735 or SAE J560 standards handle power to trailer beacons and work lamps through 7‑pin or 15‑pin sockets, ensuring compatibility across trailers and implements. Wiring diagrams for these systems frequently show both the vehicle‑side socket pinout and the trailer‑side wiring, helping you track faults across the coupling. In practice, many intermittent beacon faults trace back to poor earth continuity through the drawbar or fifth wheel, so the diagram’s emphasis on explicit earth returns is more than just theory.
Fault diagnosis using wiring diagrams: tracking shorts, open circuits and voltage drops
Effective fault diagnosis on outside lights begins with a structured reading of the wiring diagram. Start at the symptom: for example, “no left tail lamp”, then trace that circuit’s path from the power source through the relevant fuse, relay or BCM output, splice points and connector pins down to the lamp and earth. At each stage, measure voltage and continuity. A reading at the fuse but not at the lamp suggests either an open circuit between them or a corroded connector. No voltage at the fuse points to an upstream issue such as a failed relay, broken ignition feed or BCM fault.
Voltage drop testing is especially powerful for modern LED lamps. With the circuit powered and the lamp connected, measure voltage directly across the positive feed and earth at the lamp. Anything more than about 0.5–0.7 V drop in a 12 V system indicates excess resistance. Working back along the diagram, test across each splice and connector until the faulty segment is located. Because LED loads are relatively small, even modest corrosion or a half‑broken wire can be enough to prevent correct operation or to trigger bulb‑out warnings, so taking the time to follow the diagram methodically pays dividends in reduced parts‑swapping and guesswork.